Hi
everybody,
Today I
will show how to create hierarchical treeview using jsTree jquery plugin http://www.jstree.com in MVC
Source code on GitHub https://github.com/aperepjolkin/jstreemvcdemo
Source code on GitHub https://github.com/aperepjolkin/jstreemvcdemo
1. Open Visual Studio 2013 and create MVC
project

2. Open Package Manager Console and run
Install-Package jsTree. This will add jsTree js and css files to the project

3. After successful installation you
will find a jsTree files under project folder Scripts

4. Add jsTree js and css files in
master page layout _Layout.cshtml (View > Shared > _Layout.cshtml) between
<head> tag using @Styles and @Scripts

<head>
<meta charset="utf-8" />
<meta name="viewport" content="width=device-width,
initial-scale=1.0">
<title>@ViewBag.Title - My ASP.NET Application</title>
@Scripts.Render("~/bundles/jquery")
@Styles.Render("~/Content/css")
@Styles.Render("~/Content/jsTreeCss")
@Scripts.Render("~/bundles/jsTree")
@Scripts.Render("~/bundles/modernizr") </head>
|
5. Open folder file BundleConfig.cs in App_Start
folder and add the following code for js and css file of jsTree plugin
bundles.Add(new ScriptBundle("~/bundles/jsTree").Include(
"~/Scripts/jsTree3/jstree.js"));
bundles.Add(new StyleBundle("~/Content/jsTreeCss").Include(
"~/Scripts/jsTree3/themes/default/style.css"));
|

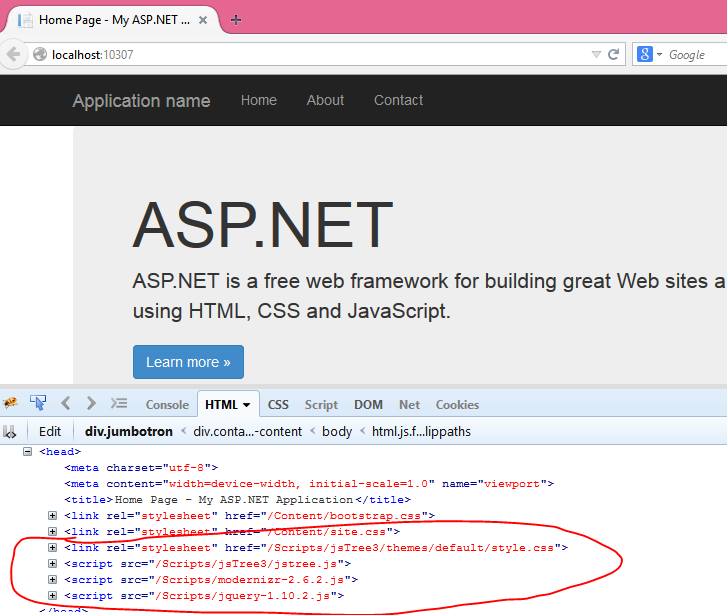
6. Now if we run our application jquery
and jsTree should be registered in our pages and we could use it.
Now we are going to create our model for hierarchical tree. We will use
code-first model in this example, and I will show you how to use Entity
Framework in MVC project.
7. When we create MVC project in Visual
Studio 2013 it automatically adds some useful thing to it. So if we look at
References part of our project we will find EntityFramework reference to dll
already added. In other cases, if you don’t have this reference, you can
install it by using Install-package command

8. Create new class in folder Models
and call it CategoriesModel.cs

9. Copy /paste the following code to
the class file.
public class CategoriesModel
{
public int ID { get; set; }
public string CategoryName { get; set; }
public int ParentId { get; set; }
public IList<CategoriesModel> Children = null;
public CategoriesModel()
{
Children = new List<CategoriesModel>();
}
}
|
Create the Database Context
The main
class that coordinates Entity Framework functionality for a given data model is
the database context class. You create this class by deriving from
the System.Data.Entity.DbContext class. In your code you specify which
entities are included in the data model. You can also customize certain Entity
Framework behavior. In this project, the class is named CategoryContext.cs
1. Create folder with name DAL under project and
add new class with name CategoryContext.cs

2. Copy code into the class
using System.Data.Entity;
using System.Data.Entity.ModelConfiguration.Conventions;
using jsTreeЬMVC.Models;
namespace jsTreeЬMVC.DAL
{
public class CategoryContext : DbContext
{
public CategoryContext() : base("CategoryContext")
{
}
public DbSet<CategoriesModel> CategoriesModels { get; set; }
protected override void OnModelCreating(DbModelBuilder modelBuilder)
{
modelBuilder.Conventions.Remove<PluralizingTableNameConvention>();
}
}
}
|
3. This code creates a DbSet property for each entity set. In Entity
Framework terminology, an entity set typically corresponds to a
database table, and an entity corresponds to a row in the table.
The name of the connection string (which you'll add to the Web.config file
later) is passed in to the constructor. The modelBuilder.Conventions.Remove statement
in the OnModelCreating method prevents table names from being
pluralized.
The Entity Framework can automatically create (or drop and re-create) a
database for you when the application runs. You can specify that this should be
done every time your application runs or only when the model is out of sync
with the existing database. You can also write a Seed method that the
Entity Framework automatically calls after creating the database in order to
populate it with test data.
4. In the DAL folder, create a new
class file named CategoryInitializer.cs and replace the
template code with the
following code, which causes a database to be created when needed and loads test data into the new database.
Insert code here
following code, which causes a database to be created when needed and loads test data into the new database.
Insert code here
5. To tell Entity Framework to use your
initializer class, add an element to the entityFramework element in
the application Web.config file (the one in the root project
folder), as shown in the following example:
<entityFramework>
<contexts>
<context type="jsTreeMVC.DAL.CategoryContext,
jsTreeMVC">
<databaseInitializer type="jsTreeMVC.DAL.CategoryInitializer,
jsTreeMVC"
/>
</context>
</contexts>
............
|
6.
In this tutorial we'll work with LocalDB. Open the application Web.config file
and add a connectionStringselement preceding the appSettings element,
as shown in the following example. (Make sure you update theWeb.config file
in the root project folder. There's also a Web.config file is
in the Views subfolder that you don't need to update.)
<connectionStrings>
<add name="CategoryContext" connectionString="Data
Source=(LocalDb)\v11.0;Initial Catalog=aspnet-jsTreeЬMVC-20141113080330;Integrated
Security=True" providerName="System.Data.SqlClient" />
</connectionStrings>
|

Creating a Controller and Views
Now
you'll create a web page to display data, and the process of requesting the
data will automatically trigger
the creation of the database. You'll begin by creating a new controller. But before you do that, build the project to make the model and context classes available to MVC controller scaffolding.
the creation of the database. You'll begin by creating a new controller. But before you do that, build the project to make the model and context classes available to MVC controller scaffolding.
1. Right-click
the Controllers folder in Solution Explorer,
select Add, and then
click New Scaffolded Item.
2. In
the Add Scaffold dialog box, select MVC 5 Controller with views,
using Entity Framework.

3. In
the Add Controller dialog box, make the following selections and then click Add:

4. Visual
Studio opens the Controllers\CategoryController.cs file. You see a class variable has
been created that instantiates a database context object:
private
CategoryContext db = new CategoryContext();
|
5. Press
CTRL+F5 to run the project.
6. Now
it is time to use jsTree. Open
folder Controller > CategoryControllers.cs and find method Index()
7. Copy the following code
public ActionResult
Index()
{
List<CategoriesModel>
categoryList = new List<CategoriesModel>();
categoryList
= db.CategoriesModels.ToList();
var rootCategory =
categoryList.Where(x => x.ParentId== 0).FirstOrDefault();
SetChildren(rootCategory, categoryList);
return
View(rootCategory);
}
|
8. Add
the following method above the Index method
private void SetChildren(CategoriesModel
model, List<CategoriesModel>
catList)
{
var childs = catList.Where(c
=> c.ParentId == model.ID).ToList();
if (childs.Count > 0)
{
foreach (var child in childs)
{
SetChildren(child,
catList);
model.Children.Add(child);
}
}
}
|
9. Open
Index.cshtml view under View > Category

10. Copy
the following code
@model jsTreeЬMVC.Models.CategoriesModel
@{
ViewBag.Title = "Category";
}
<h2>Category</h2>
<script>
var j = jQuery.noConflict();
j(function () {
j("#jstree_demo_div").jstree({
"checkbox": {
"keep_selected_style": true
},
"plugins": ["checkbox"]
});
var to = false;
j('#plugins4_q').keyup(function () {
if (to) { clearTimeout(to); }
to = setTimeout(function () {
var v = j('#plugins4_q').val();
j('#jstree_demo_div').jstree(true).search(v);
}, 250);
});
});
</script>
<input type="text" style="margin:0em auto 1em auto; display:block;padding:4px; border-radius:4px; border:1px solid silver;" class="input" value="" id="plugins4_q">
<div id="jstree_demo_div">
<ul id="tree">
<li>
<a href="#">@Model.CategoryName</a>
@Html.Partial("Children", Model)
</li>
</ul>
</div>
|
11. Create partial view under Category folder with name "Children" and copy the following code
@model jsTreeЬMVC.Models.CategoriesModel
@foreach (var item in Model.Children)
{
<ul>
@if (item != null)
{
<li id="@item.ID">
<a href="#" class="cat">@item.CategoryName</a>
@if (item.Children.Count > 0)
{
@Html.Partial("Children",
item)
}
</li>
}
</ul>
}
|
12. Press
CTRL+F5 to run the project.
13. You
should see the tree view

14. The
nice feature of jsTree plugin I have found is search. If you add search plugin
in jsTree definition and add the text box on the page you can get a nice search
functionlaity.
j("#jstree_demo_div").jstree({
"checkbox": {
"keep_selected_style": true
},
"plugins": ["checkbox", "search"]
});
|
<input type="text" style="margin:0em auto 1em auto; display:block; padding:4px; border-radius:4px; border:1px solid silver;" class="input" value="" id="plugins4_q">
|

Result:
At the start of the solution we had table view of data, but using jQuery jsTree plugin we got a nice interactive tree view of the data
Before
After
That’s
all. Have a nice day. I hope you will find it helpfull. J